TensorFlow is basically a python friendly end to end platform to create machine learning project.
In this project we are using tf.data.dataset api of tensor to build the model.
The advantage of using an input pipeline is that our data is loaded in chunks. That way we can manipulate a huge load of data. This is what we need for this project.
If you go to the repo I mention here, you will find that two data directories and if you download that you will find tons of images of variable size to be processed and trained.
Another advantage of TensorFlow is inbuild data augmentation feature which is great if you have considerable number of data.
In general this is done with Pandas, Numpy -text / tabular/ numerical data, or Keras ImageDataGenerator / OpenCV-image data.
Before I started with the image data processing part, I tried few code for getting my hands flexible with tenserflow.
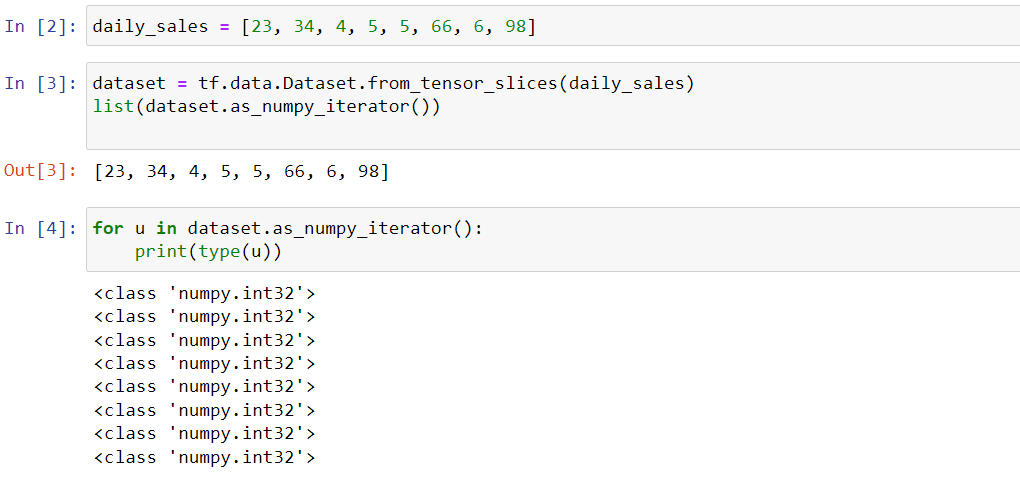
So you can actually use from_tensor_slices function from tf.data.Dataset to get a numpy tensor and then use a iterator function to see the individual output.
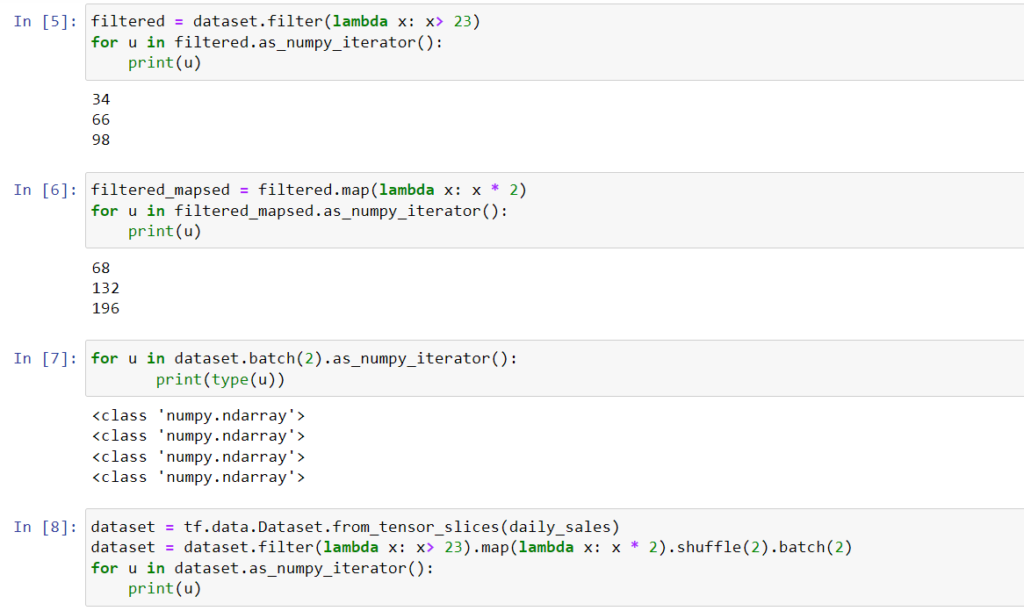
As you can see, the input can transformed using filtering then mapping, shuffling and batching.
That was my exercise about TensorFlow. Now was the time when I apply to create an image processing pipeline.
First thing first, how the data is organized. That should be the first question in mind.

As you can see, we have images contained in multiple classes for one project and for binary classes for the another.
data_images = tf.keras.utils.image_dataset_from_directory(data_dir)The first step was to get the image from the directory and convert them to numpy arrays. This set of array can be fed to the model.
After you create the data_images, you can execute this code to see what’s coming next.
batch = data_images.as_numpy_iterator().next()
len(batch)
data_images.class_names
batch[0]
type(batch[0])
If you go to image_dataset_from_directory definition, you will see it yields a tuple (images, labels). so it gives back the encoded labels are well, which is why I passed the Y value as it is while scaling the images in the lambda function. That’s the next step after you get the images and labels. You can find more info in the notebooks I shared.
However, in case of multiple classes, I used tf.one_hot to encode the categorical classes to get the desired output.
data_images= data_images.map(lambda x, y : (x/255, tf.one_hot(y, depth = 4)))
data_images
Generally, we split the data into 70:30 ratio, which is exactly what I did here. We do the sampling over the scaled images.
train_size = int(len(data_images)*0.7)
val_size = int(len(data_images)*0.3)
train_size + val_size
Next comes, dividing the dataset to training and validation sets.
training_ds = data_images.take(train_size)
val_ds = data_images.skip(train_size).take(val_size)
# testing_ds = data_images.skip(train_size+val_size).take(test_size)
data_images.as_numpy_iterator().next()[1].shape
Have used a take function from TensorFlow to take and skip the images sets. There are the sets we will use for fitting the model.
That’s it for the image preprocessing. We get the X and Y in the desirable format, scaled , all ready to be filled in the model.
Next we go for model building’.
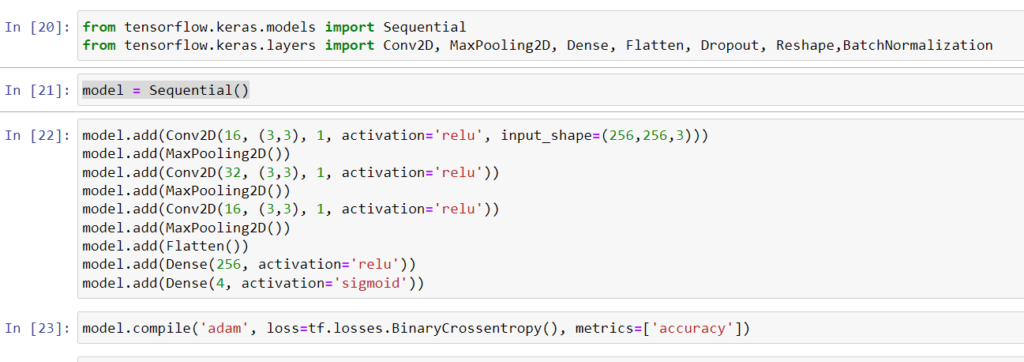
Things are simple over here. We will add 3 conv2d and max pooling layers along with flattening it and then apply dense layer to narrow down the scope to a probability.
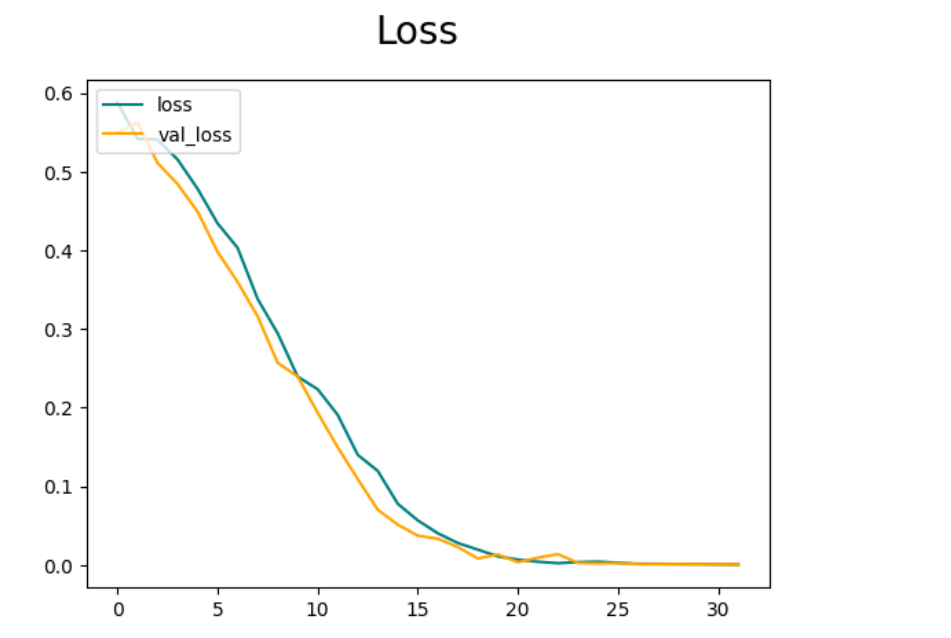
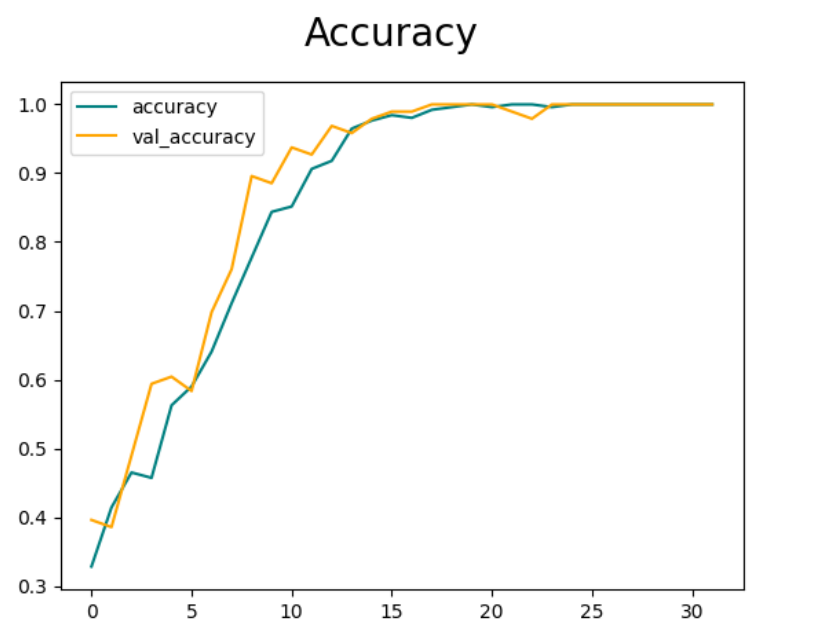
And then we fit the model.
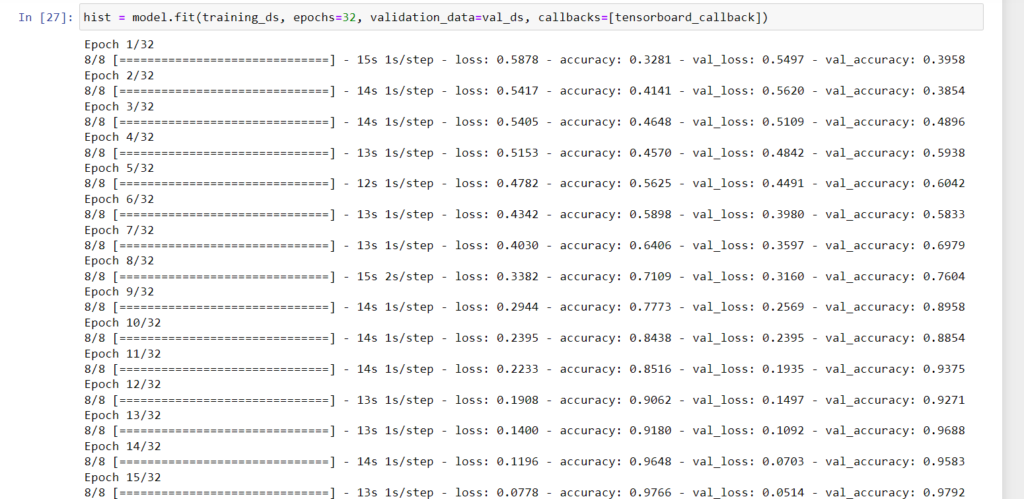
Below is the accuracy and loss metrics traced.
The one thing that I look out for is that loss needs to decrease and accuracy needs to increase.
Further more, use this code to see if predictions are correct.
import numpy as np
from keras.preprocessing import image
# Input image
test_image = image.load_img(
    f'test_images/emotions.jpg', target_size=(256, 256))

# For show image
plt.imshow(test_image)
test_image = image.img_to_array(test_image)
test_image = np.expand_dims(test_image, axis=0)
result = model.predict(test_image)
result[0]
Hope it helps!