This is going to be really comprehensive. Recently, I integrated shopify with django and react and created a public with a simple login and registration page.
I spent two days trying to figure out the tech stack to be used to achieve this. Tried various configurations but this is the one which worked.
So, here are couple of things you may want to have handy before start with this.
I will start by showing the folder structure arrangement for the repository.
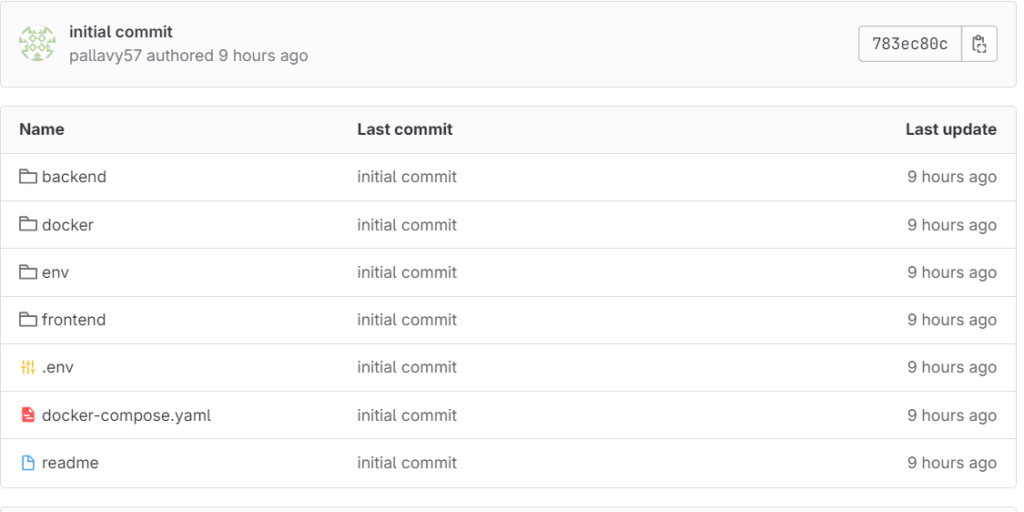
Here the couple of things you should have is the backend folder, docker folder, frontend folder and a docker compose file to run the both services alltogether.
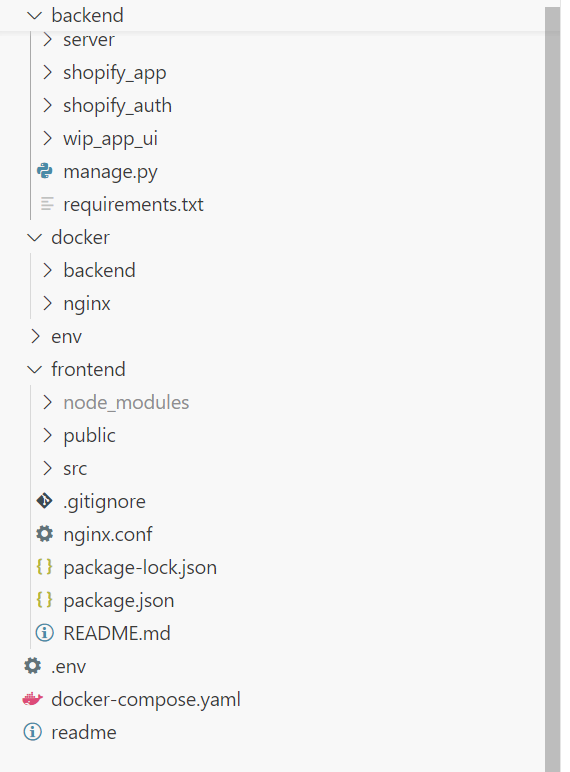
If I go deep then, you would have to create a core settings folder to hold all the settings of the django project plus you would have a folder handling the auth part of the app and another folder to hold the basic functionality of the app. These folders should be created in the same directory as the manage.py file.
For the frontend folder there is a simple react app.
The docker folder contains the docker files for both backend and nginx which is used to render the static files for react on a specific URL.
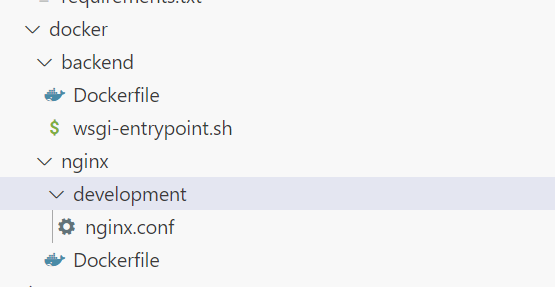
Creating the docker files and other configurations
I will give you the docker file config along with the docker compose backend part.
FROM python:3.12.2-slim-bookworm
ENV PYTHONDONTWRITEBYTECODE=1
ENV PYTHONUNBUFFERED=1
WORKDIR /app
COPY ./backend/requirements.txt /app/backend/
RUN pip install -r backend/requirements.txt
ADD ./docker /app/docker
ADD ./backend /app/backend
RUN chmod +x /app/docker/backend/wsgi-entrypoint.sh
backend:
restart: unless-stopped
build:
context: .
dockerfile: ./docker/backend/Dockerfile
entrypoint: /app/docker/backend/wsgi-entrypoint.sh
volumes:
- static_volume:/app/backend/server/django_static
expose:
- 8000
environment:
- PG_NAME=XXXX
- PG_PASSWORD='XXXX'
env_file:
- .env In the above docker file we are creating the working directory in the docker container, copying the requirements file to download the dependencies on the container. Last thing is to copy the docker and backend folder to the container in same folder as present in the repo and making the entry point executable.
Now coming to the docker compose part, we have to build the context to search the docker file to build the image. There are other formalities we have to do like giving the entrypoint and other env specific stuffs. I am assuming you have already created your database and add user to it.
I will show you what are the contents of the entrypoints file.
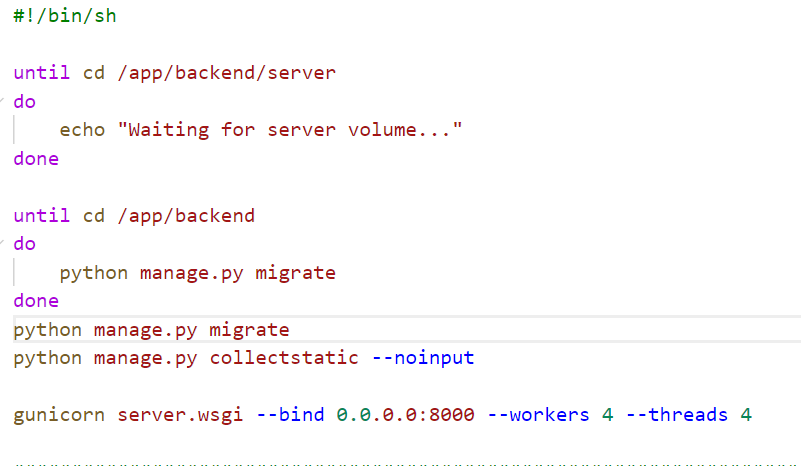
So it contains the basic commands to start the app in production. we have to cd to the backend folder where the manage.py file is there and run the commands and collectstatic is required to put all the static files to a folders, and final run the server.
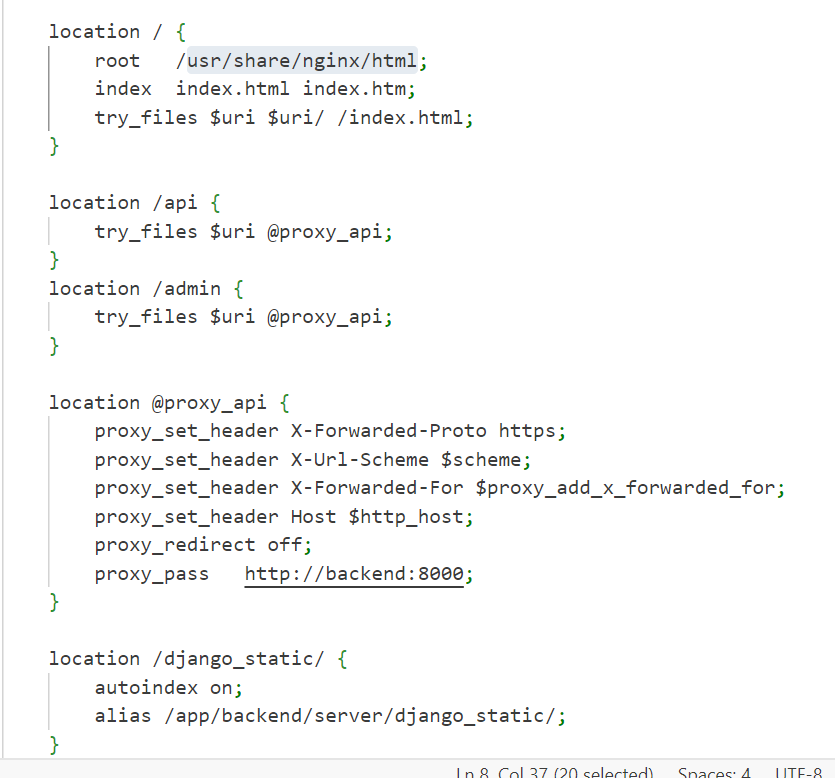
For nginx related configurations, we have to refer nginx docs. This root is where all the static files are stored we are transferring the builder folder of frontend to this location from which nginx with serve.
server {
    listen 80;
    server_name _;
    server_tokens off;
    client_max_body_size 20M;

    location / {
        root   /usr/share/nginx/html;
        index  index.html index.htm;
        try_files $uri $uri/ /index.html;
    }

    location /api {
        try_files $uri @proxy_api;
    }
    location /admin {
        try_files $uri @proxy_api;
    }

    location @proxy_api {
        proxy_set_header X-Forwarded-Proto https;
        proxy_set_header X-Url-Scheme $scheme;
        proxy_set_header X-Forwarded-For $proxy_add_x_forwarded_for;
        proxy_set_header Host $http_host;
        proxy_redirect off;
        proxy_pass   http://backend:8000;
    }

    location /django_static/ {
        autoindex on;
        alias /app/backend/server/django_static/;
    }
}
Here is the react docker file contents.
# The first stage
# Build React static files
FROM node:13.12.0-alpine as build

WORKDIR /app/frontend
COPY ./frontend/package.json ./
COPY ./frontend/package-lock.json ./
RUN npm install
COPY ./frontend/ ./
RUN npm run build

# The second stage
# Copy React static files and start nginx
FROM nginx:stable-alpine
COPY --from=build /app/frontend/build /usr/share/nginx/html
CMD ["nginx", "-g", "daemon off;"]
The nginx part of the docker compose would do the same thing as backend.
    nginx:
        restart: unless-stopped
        build:
            context: .
            dockerfile: ./docker/nginx/Dockerfile
        ports:
            - 80:80
        volumes:
            - static_volume:/app/backend/server/django_static
            - ./docker/nginx/development:/etc/nginx/conf.d
        depends_on:
            - backend
Apart from general settings of getting the django app started we have to add this config to set the static root which django and nginx combinely use to serve the file from nginx folder. This has to be done in the settings file of the core folder in backend folder.
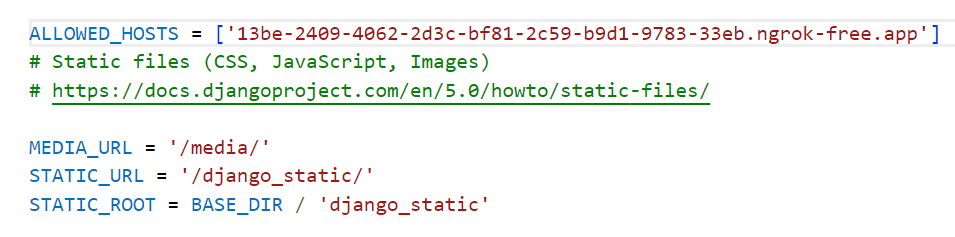
we have to allow host which solves the cors issue for django.
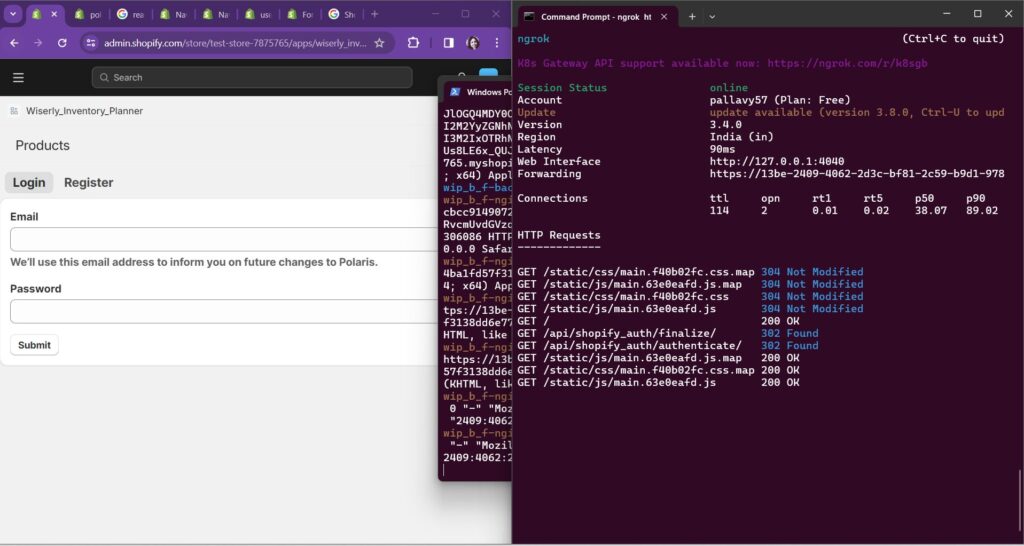
The configuration part is over now if run docker compose up then you will see the app running. It will build the frontend app tranfer the build files and make the nginx serve it and then backend would compile and start the django server.
At this time, if you visit http://localhost/ you would see react app being served.
Shopify specific configurations
When you configure the shopify app in the admin dashboard, you will see they are asking for app URL and one redirection URL.
We have to author this in our auth app, and also make sure the user is not able to access the app unless it is installed in any shop because the nginx is serving on an in independent URL we have to take this into consideration.
There are two end points as /authenticate and /finalize before the app shows up on the UI.
When the install this app there is shopify authetication process which will trigger and redirect to finalize URL .. Couple of things we want to do here in authenticate is :
- Get the shop parameter from the request object]
- Collect all the scopes from the URL
- Mentiion the redirection URL
- Calculate the state and store that in a session
- Create the permission URL
Now in finalize view you want to do some of the following stuff:
- Get the hmac from the params
- Use the shopify secrets to create a hmac
- Compare both to decide if you can redirect to the redirection URL which is App url
You will the authentication flow logic in the shopify docs if you search.
Frontend Specific Configuration
After that we have to make sure that we dont allow to access the app url if the user is not on shopify platform. This can be done from the react app itself.
You can checkout this code.
import './App.css';
import React from "react";
import {Home} from "./components/Home"
import {
ApolloClient,
ApolloProvider,
HttpLink,
InMemoryCache,
} from "@apollo/client";
import {
useAppBridge,
} from "@shopify/app-bridge-react";
import { authenticatedFetch } from "@shopify/app-bridge-utils";
import { Redirect } from "@shopify/app-bridge/actions";
import { AppProvider as PolarisProvider } from "@shopify/polaris";
import translations from "@shopify/polaris/locales/en.json";
import "@shopify/polaris/build/esm/styles.css";
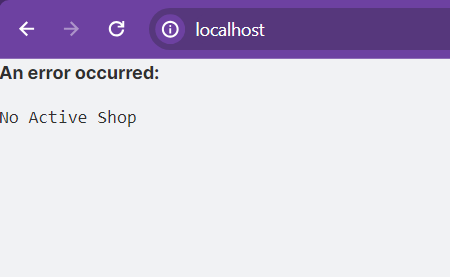
function ErrorHandler({ error }) {
return (
<div role="alert">
<p>An error occurred:</p>
<pre>{error.message}</pre>
</div>
);
}
function App() {
let shop = new URL(window.location).searchParams.get("shop");
let hmac = new URL(window.location).searchParams.get("hmac");
function renderMainPage() {
const rendeerRerror = () => {
throw new Error("No Active Shop");
};
try {
new URL(window.location).searchParams.get("hmac") === null && rendeerRerror();
new URL(window.location).searchParams.get("shop") === null && rendeerRerror();
} catch (error) {
console.log("errir");
return <ErrorHandler error={error} />;
}
}
return (
<div>
{new URL(window.location).searchParams.get("hmac") === null &&
new URL(window.location).searchParams.get("shop") === null ? (
renderMainPage()
) : (
<PolarisProvider i18n={translations}>
<MyProvider>
<Home shop={shop} hmac={hmac} />
</MyProvider>
</PolarisProvider>
)}
</div>
);
}
export default App;
function MyProvider({ children }) {
try {
const app = useAppBridge();
const client = new ApolloClient({
cache: new InMemoryCache(),
link: new HttpLink({
credentials: "include",
fetch: userLoggedInFetch(app),
}),
});
console.log("hjgh", client);
return <ApolloProvider client={client}>{children}</ApolloProvider>;
} catch (err) {
console.log(err.message)
return <ErrorHandler error={err} />;
}
}
export function userLoggedInFetch(app) {
const fetchFunction = authenticatedFetch(app);
return async (uri, options) => {
const response = await fetchFunction(uri, options);
if (
response.headers.get("X-Shopify-API-Request-Failure-Reauthorize") === "1"
) {
const authUrlHeader = response.headers.get(
"X-Shopify-API-Request-Failure-Reauthorize-Url"
);
const redirect = Redirect.create(app);
redirect.dispatch(Redirect.Action.APP, authUrlHeader || `/auth`);
return null;
}
return response;
};
}It make use of app bridge to configure the frontend to fetch authorized access. Now you are able to use
polaris and app-bridge to create your web app functionality.
Did you learn anything new thing from this article? Do you have questions? Comment below or connect with me on Linkedin